Friday, September 21, 2012

Mini-Sims progress report

I got Justin's deck laminate coat glassed on Thursday afternoon and did a separate patch lamination today for the "West Coast Hercs" patch and my logo.  His lamination came out really nice.  Next is a light sanding, grinding off the FCS plug covers, leash plug install, hot coats, and final sanding.
 2 layers of 6oz cloth ready for lamination
laminating completed.  

Thursday, September 20, 2012

10'0" Longboard Blank & Wood Tail Block

Next board up will be a 10'0" longboard.  I went by the Holladay Surfboards factory and John Holladay, Clay Bennett, and I decided to use the Clark Foam 10'4" template on an existing 10'0" SUP blank to build a good nose rider.  John is experimenting with colored glues, so I had him use black pigment on the blank.  We decided to cutout a crescent on the deck/rails and glue it up to give it a triple stringer look like a classic looking WRV that I rode for years.

I'm also toying with the idea of adding a tail block to the longboard.  I glued two pieces of red oak with a thin piece of marine plywood for a simple design.  Below are pics of the raw blank and tail block.


Saturday, September 15, 2012

Glassing updates for Quad Fish

Serena decided to go for a tie dye blue & white resin swirl pattern for her deck.  I used white opaque, light blue opaque, and blue tint for the pattern colors.  I made the pattern radiate from a central white spot where the logo goes.  The inlay was cut with a razor just before curing to leave a clean transition line that mirrors the curvature of the rail.  Here are some pics of the process:

Just after pulling off excess resin

 Lap cut & logo laminated


Saturday, September 8, 2012

Glassing updates for Quad Fish & Mini Simmons

Here is Serena's quad fish bottom laminate coat after cutlap on the deck.  I used resin opaque to get uniform coloring.  It looked lime green when I mixed the colors; however, once spread on the board the resin looks a bit darker...maybe a grass green.  Colors usually get muted by the hot coat after sanding, so we'll see what the end product looks like soon!  I'm going to glass the logos separately so that the resin coloring doesn't drown them out.  It is all coming together now....
Bottom after glassing logo separately

Justin's mini-simmons with the bottom laminate coat after cutlap on deck.  Used resin opaque on this one too for best results.


Monday, September 3, 2012

Updates on 5'8" Quad Fish & 5'6" Mini-Simmons

Here are the latest pics of the progress.  There was a slight delay due to my supply chain...I was waiting for some FCS fusion plugs to arrive from CA, but got them in this week and they are installed.  I also took pics of logo placement for both boards to make sure it is what they had in mind.  The glassing process starts next!  Serena's will be a limey green and Justin's will be red.  I'm using resin opaques for best results on both.
 Serena's fish with the logo she designed!
 Serena's fins (FCS equivalent of M3 fronts and GX rears)
I chose a plywood with green glue to match the board...subtle, but it will look sharp
 Serena's quad plugs installed
 Justin's deck w/ "West Coast Hercs" logo in center
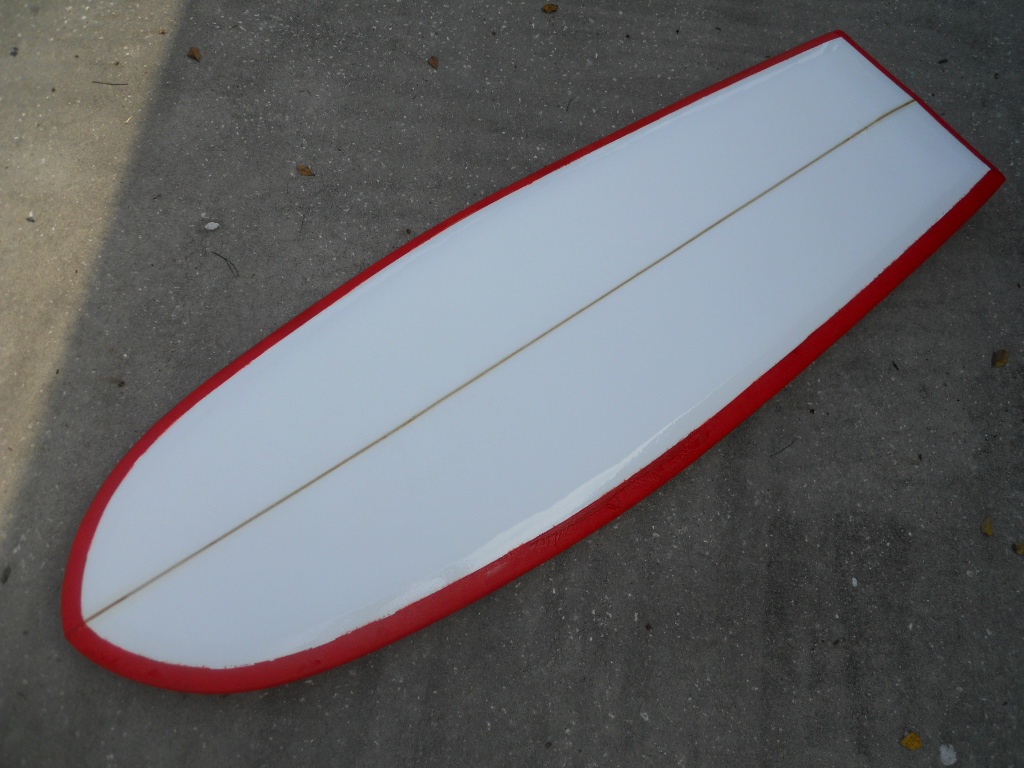
Justin's bottom with potential logo...if he likes it